Our Seventh Lab: Using a NeoPixel Display
Parts for this Lab:
-
We will use the neopixel display.
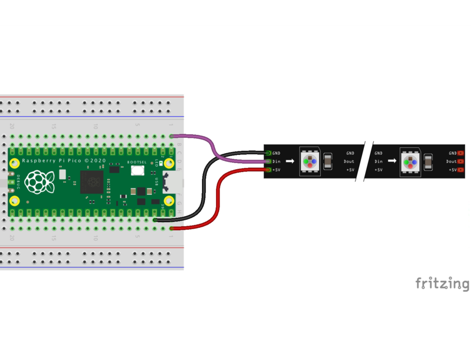
- Insert the lead from GND of the display into
j3 - Insert the lead from VCC of the display into
j40 - Insert the lead from IN of the display into
a1
- Insert the lead from GND of the display into
-
When you are finished, your breadboard should look similar to the image below (Note: your wires may be different colors)
Working With the NeoPixel Display
-
NeoPixels are Red-Green-Blue LEDs that are designed to makes them easy to control with three wires: GND, +5V and a single serial data line.
-
Controlling NeoPixels is simple using BIPES. We only need a few blocks to control the display.
-
First, we'll need the Init NeoPixel block from Displays NeoPixel Led Strip section
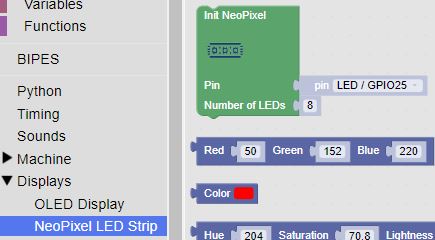
Our NeoPixel display has 8 segments, and we connected it to Pin 1, so make sure to set the Pin and Number of LEDs correctly in the block.
-
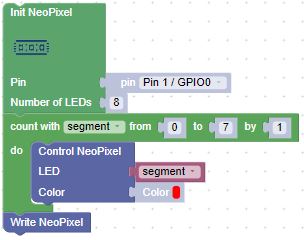
Let's set all of the segments red:
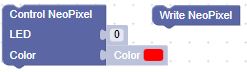
- We'll need two more blocks from the Displays NeoPixel Led Strip Section (Control NeoPixel and Write NeoPixel)
- Now, with a count Loop block, we can set all of the segments
-
Challenge
Using a variety of colors, set the pixels, one at time to each color such that it appears that the display starts out with a single pixel lit in a color, then two pixels in the same color, etc. until all 8 are lit. Then start on a second color lighting the first pixel.
![]()
Colors can be found here: https://www.rapidtables.com/web/color/RGB_Color.html
Once that works, turn the entire set of pixels on with a single color, then move to the next color that you selected.